

One of the most common things in Android development is model creation. It is usually a three-step process that consists of:
- Analyzing network response
- Manually writing data models
- Making relations between models
There are some online tools that can boost your speed, but in the end, you are the one doing most of the labor. There is another way, though. You could be using GraphQL. All you need is a Schema file that you can get from the back-end department. In this tutorial, we will cover Apollo GraphQL. Another feature that we will introduce in this small project is Coroutines. They simplify your code that runs asynchronously. No need for long callbacks anymore. Thread safety is supported out of the box.
Let’s begin by creating an empty Kotlin project.
GraphQL requires newer versions of Gradle. Go to the gradle-wrapper.properties file and paste the distribution URL:
1distributionUrl=https\://services.gradle.org/distributions/gradle-6.3-all.zip
It also uses default interface methods that are only supported from API 24. To solve this issues, add Java version 8 as compiler. In build.gradle (app) add the following:
1 2 3 4 5 6 7 8android { … compileOptions { sourceCompatibility JavaVersion.VERSION_1_8 targetCompatibility JavaVersion.VERSION_1_8 } … }
Next on the list are dependencies required to build project. GraphQL uses OkHttp client under the hood so we need to add that dependency as well.
1 2 3 4 5implementation "com.squareup.okhttp3:okhttp:4.6.0" implementation "org.jetbrains.kotlinx:kotlinx-coroutines-core:1.3.5" implementation "org.jetbrains.kotlinx:kotlinx-coroutines-android:1.3.0" implementation "com.apollographql.apollo:apollo-runtime:2.0.1" implementation “com.apollographql.apollo:apollo-coroutines-support:2.0.1”
At the top of the build.gradle (app) apply the plugin by writing down the following line
1apply plugin: 'com.apollographql.apollo'
At the bottom of the build.gradle (app) add an extension
1 2 3apollo { generateModelBuilder = true }
This allows us to use the to make our requests easier to handle. In order to add the plugin to the project go to the build.gradle (Project) and insert the next line into the dependencies :
1classpath "com.apollographql.apollo:apollo-gradle-plugin:2.0.1"
Do not forget to add a Network Permission into the Manifest file. When making requests, Apollo instance needs to be provided. In this case, Singleton pattern is preferred. I created a file called ApolloClient.kt and acquired Apollo instance within it. You can find the code
Now, to the GraphQL example. It’s very simple. An array of books. Each book contains a title and author name.
1 2 3 4 5 6 7type Book { title: String author: String } type Query { findBooks(title:String): [Book] }
There is also a Query which takes a title as an argument. It is optional. If no title is provided, books are fetched without a filter.
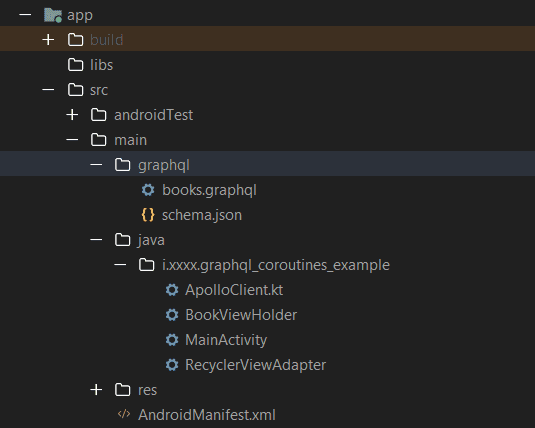
Create a new folder “graphql” inside the “src/main” directory.
Grab an auto-generated schema file and place it within "graphql" directory. It should be in JSON format. If you don’t have it you can acquire it via the plugin helper. Run the following Gradle script provided by the plugin. Make sure that the back-end endpoint is accessible.
1./gradlew downloadApolloSchema -Pcom.apollographql.apollo.endpoint=https://your.graphql.endpoint -Pcom.apollographql.apollo.schema=PATH_TO_YOUR_GRAPHQL_FOLDER/schema.json
Then we need to create queries in order to generate models. In the same folder (“graphql”) create a new file with “.graphql” extension. Here is an example for books fetching
1 2 3 4 5 6query books($title: String){ findBooks(title:$title){ title author } }
After query files are written, there is one more step to generate models. Use the terminal and execute the Gradle script in the projects directory
1./gradlew generateApolloSources
This will generate a class BooksQuery that should be used when making requests.
Next, let us set up the UI for our app. In the MainActivity’s XML file I created an EditText and Button. Data binding is enabled to write less code in Activity. You can find the XML I attached an onClick event called “getBooks” to the button and referenced the function from the MainActivity. When button is pressed, a network request is made.
This is not the best practice, though. Usually, you would separate your business logic and make a network request in some other context. For example, in the MVVM pattern, you would create a ViewModel and make a network request there. But, for the simplicity of this project, we are using Activity as a context.
When network request is done, results are displayed in the RecyclerView. RecyclerView item XML contains two TextViews: one for displaying book title and another one for author name. XML for item
In the project directory, we need to create two more files: Adapter for Recyclerview, and a ViewHolder for RecyclerView Item. What is important to notice is the model used for the ViewHolder is extracted from the auto generated BooksQuery class. In our example it would be BooksQuery.FindBook. Codes for the adapter and ViewHolder item and
Back to the MainActivity. We need to declare some variables
1 2 3 4private lateinit var binding: ActivityMainBinding private var apolloClient: ApolloClient = getApolloClient() private var job = Job() private val coroutineScope = CoroutineScope(job + Dispatchers.Main)
Going from top to bottom:
- binding -> data binding class for the MainActivity
- apolloClient-> a singleton class we previously created for creating network request
- job -> a job object which is life-cycle aware. If Activity is destroyed, the job is canceled
- coroutineScope -> a coroutine must be launched from the respective coroutine scope. If you are using the scope inside the ViewModel then you should use viewModelScope. It ensures that the scope is being properly removed because it is ViewModel life cycle aware.
Rember we referenced “getBooks” method from the XML. Let’s take a look at the rest of the code.
1 2 3 4 5 6 7 8 9 10 11 12 13 14 15 16 17fun getBooks(view: View) { coroutineScope.launch { makeSearchRequest(binding.editText.text.toString()) } } private suspend fun makeSearchRequest(value: String) { val res = apolloClient.query( BooksQuery.builder() .title(value) .build() ).toDeferred().await() binding.recyclerview.apply { adapter = res.data?.findBooks()?.let { RecyclerViewAdapter(it) } } }
When
1
getBooks(...)1
makeSearchRequest(...)On the first line
1
apolloClientToDeffered() converts ApolloCall to the Deffered which is basically a
1
JobGraphQL and Coroutines are a really sweet spot for the developers. When comparing GraphQL integration to the REST, you are gaining a lot of speed. When comparing thread executing and default callbacks to coroutines, you get cleaner code.
If you start using new technologies, you will write less code and make it more readable, which is always a preferred way of development.
Github repo for the project can be found here.


